Deploying GOAD NHA on Proxmox using Ludus
This post walks through installing Ludus on Proxmox and using it to deploy the GOAD NHA AD lab.
Requirements
Before you begin, make sure you have the following:
- Proxmox VE host installed and running
- Minimum resources:
- RAM: 32GB
- CPU: x86_64 amd64 Intel/AMD with a Passmark score > 6,000.
Note: Check your CPU score on CPU Benchmark and make sure it supports virtualization (VT-x/AMD-V).
- Disk: 200 GB+
Sources
This guide references the following sources:
Step 1: Install Ludus on the Proxmox node
I chose to use a dedicated Proxmox node for installing Ludus. Before running the installer script, install git on the node:
1
2
apt update
apt install -y git
Next, execute the Ludus installation script on the chosen node:
1
curl -s https://ludus.cloud/install | bash
During the interactive installation, enter Y to accept the default prompts. For most standard Proxmox configurations, the default settings will work without modification. The screenshots below illustrate the settings I used in my personal setup: 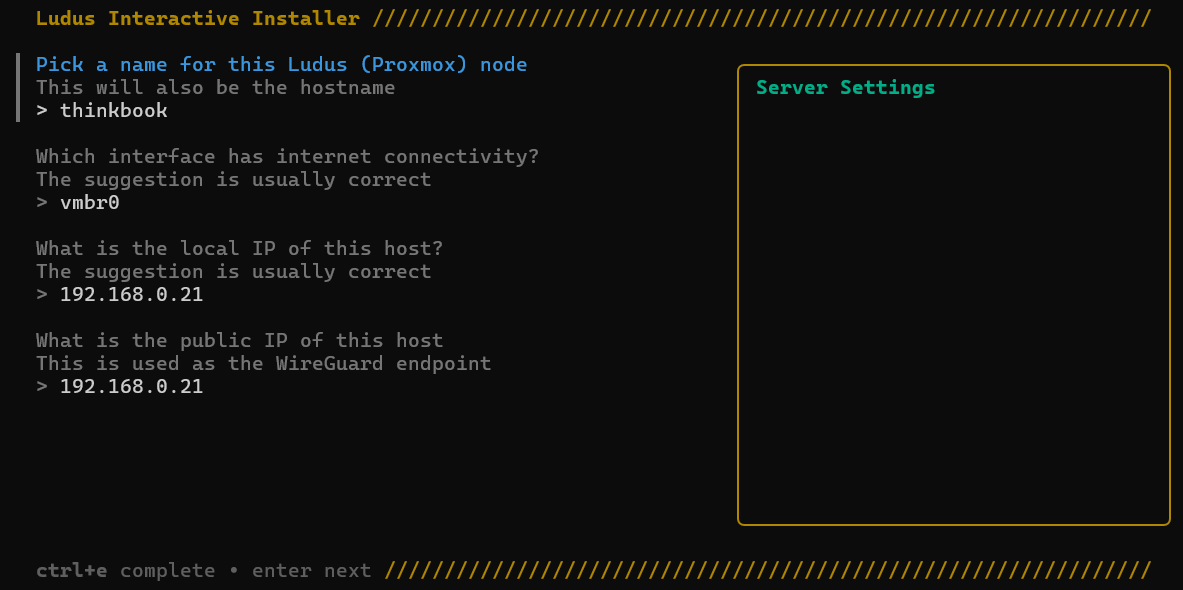
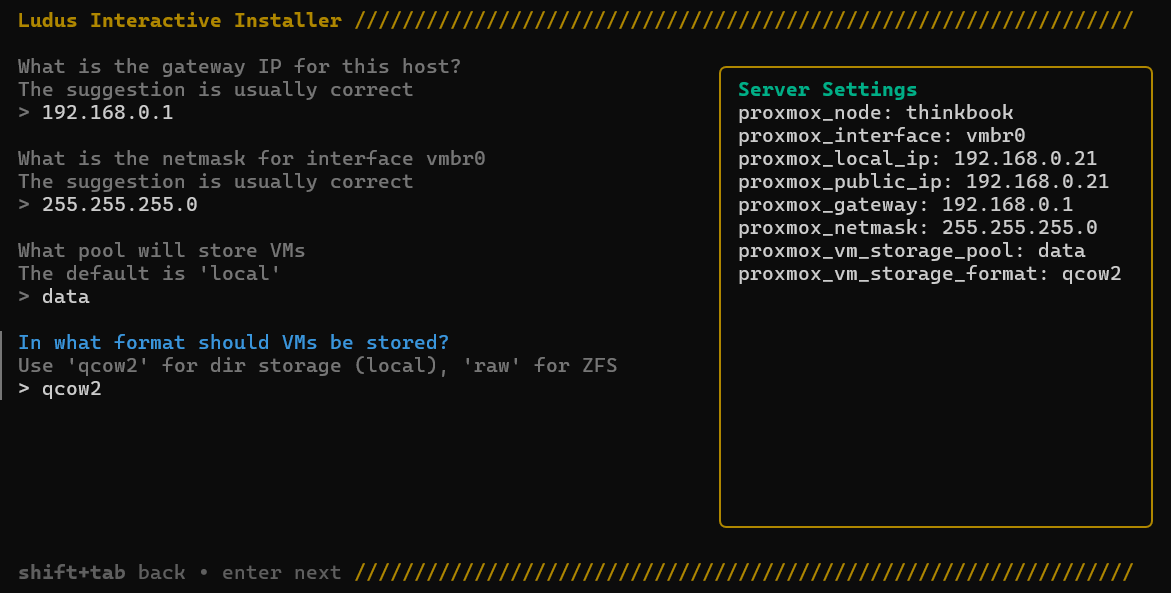
Make sure to select the correct pool, must be a directory (min. 200GB)!
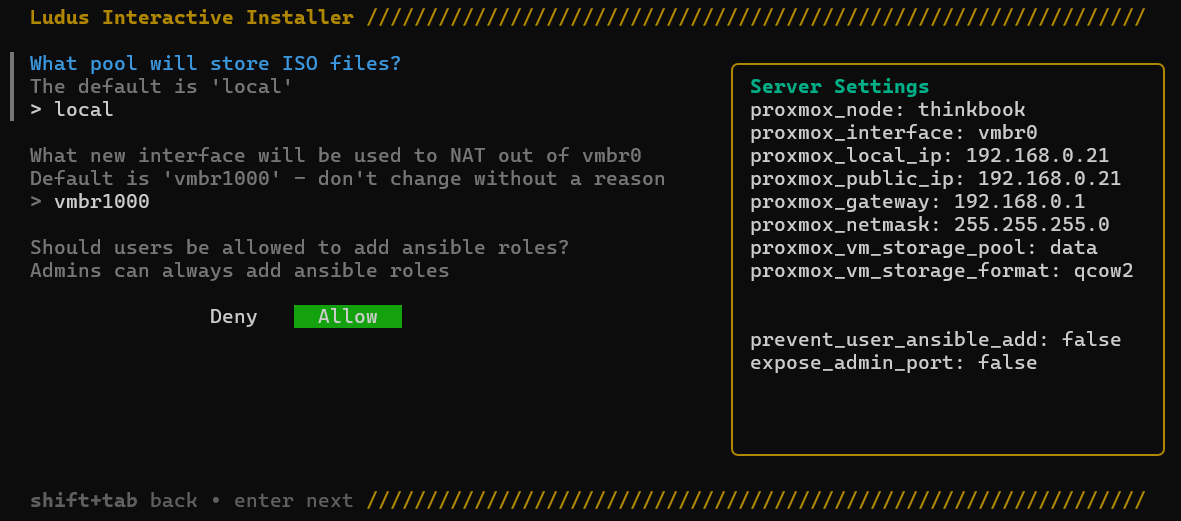
Make sure to select the correct pool for ISO’s!

Step 2: Create a User
Print the root API key:
1
2
3
ludus-install-status
Ludus install completed successfully
Root API key: <REDACTED>
Use the API key to create a new admin user:
1
2
LUDUS_API_KEY='<API-Key>' \
ludus user add --name "giiker" --userid giiker --admin --url https://127.0.0.1:8081
Set the Ludus API key to the API key of the newly created user:
1
export LUDUS_API_KEY='<Giiker-API-Key>'
Obtain the credentials for the newly created user:
1
ludus user creds get
Step 3: Build Templates
Because templates are generated from ISO files, the process can take a while, particularly with slow hardware or internet.
1
ludus templates build
Step 4: Deploy GOAD NHA
Download and build the Windows Server 2019 template:
1
2
3
4
5
6
git clone https://gitlab.com/badsectorlabs/ludus
cd ludus/templates
ludus templates add -d win2019-server-x64

# Build the template
ludus templates build
Clone the GOAD GitHub repo:
1
2
3
# Clone repo
git clone https://github.com/Orange-Cyberdefense/GOAD.git
cd GOAD
Python 3.11 is required for GOAD. Since this version is no longer available in the APT repositories on Proxmox 9.1, use Pyenv to install it instead.
1
2
3
4
5
6
7
8
9
10
11
12
13
14
15
16
17
18
# Download dependencies
apt install -y build-essential libssl-dev zlib1g-dev libbz2-dev libreadline-dev libsqlite3-dev curl libncursesw5-dev xz-utils tk-dev libxml2-dev libxmlsec1-dev libffi-dev liblzma-dev git

# Run installer script
curl https://pyenv.run | bash

# Add to .bashrc
export PATH="$HOME/.pyenv/bin:$PATH"
eval "$(pyenv init -)"
eval "$(pyenv virtualenv-init -)"

# Reload shell & install Python-3.11
exec $SHELL
pyenv install 3.11.6

# Configure Python-3.11 for the GOAD directory
cd /opt/ludus/ranges/GOAD
pyenv local 3.11.6
With the Python environment installed, deploy GOAD via the setup script:
1
2
3
4
./goad.sh -p ludus
GOAD/ludus/local > check
GOAD/ludus/local > set_lab NHA
GOAD/ludus/local > install
Snapshot the VMs:
1
ludus --user NHA58e4ec snapshot create clean-setup -d "Clean GOAD NHA setup after ansible run"
Step 4: Connect to the lab
Get the wireguard configuration for the lab:
1
ludus --user NHA58e4ec user wireguard
Copy the config to /etc/wireguard/goadnha.conf in Kali and start the VPN:
1
2
3
4
5
# Download wireguard
sudo apt install wireguard

# Start wireguard
sudo wg-quick up goadnha
We are now able to reach the machines inside the lab and start hacking! 